Authentication-Using-Mern-Stack
All About MERN-Stack Authentication

Authentication using MERN-Stack

⭐ About The Project
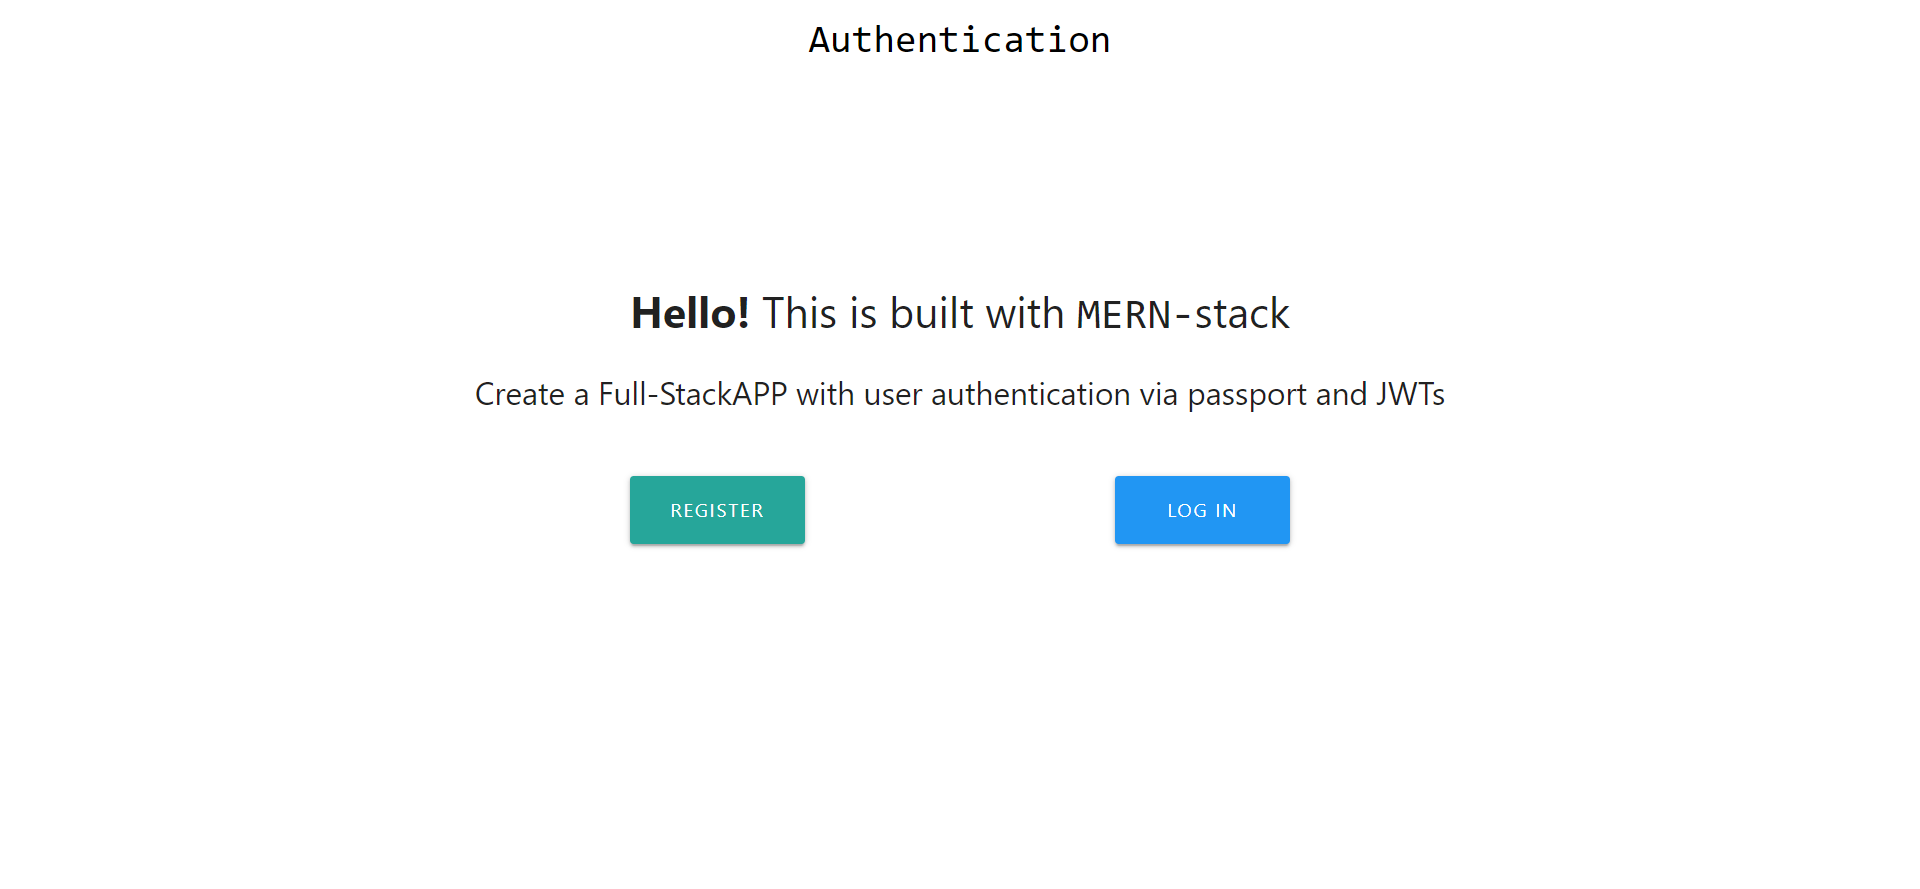
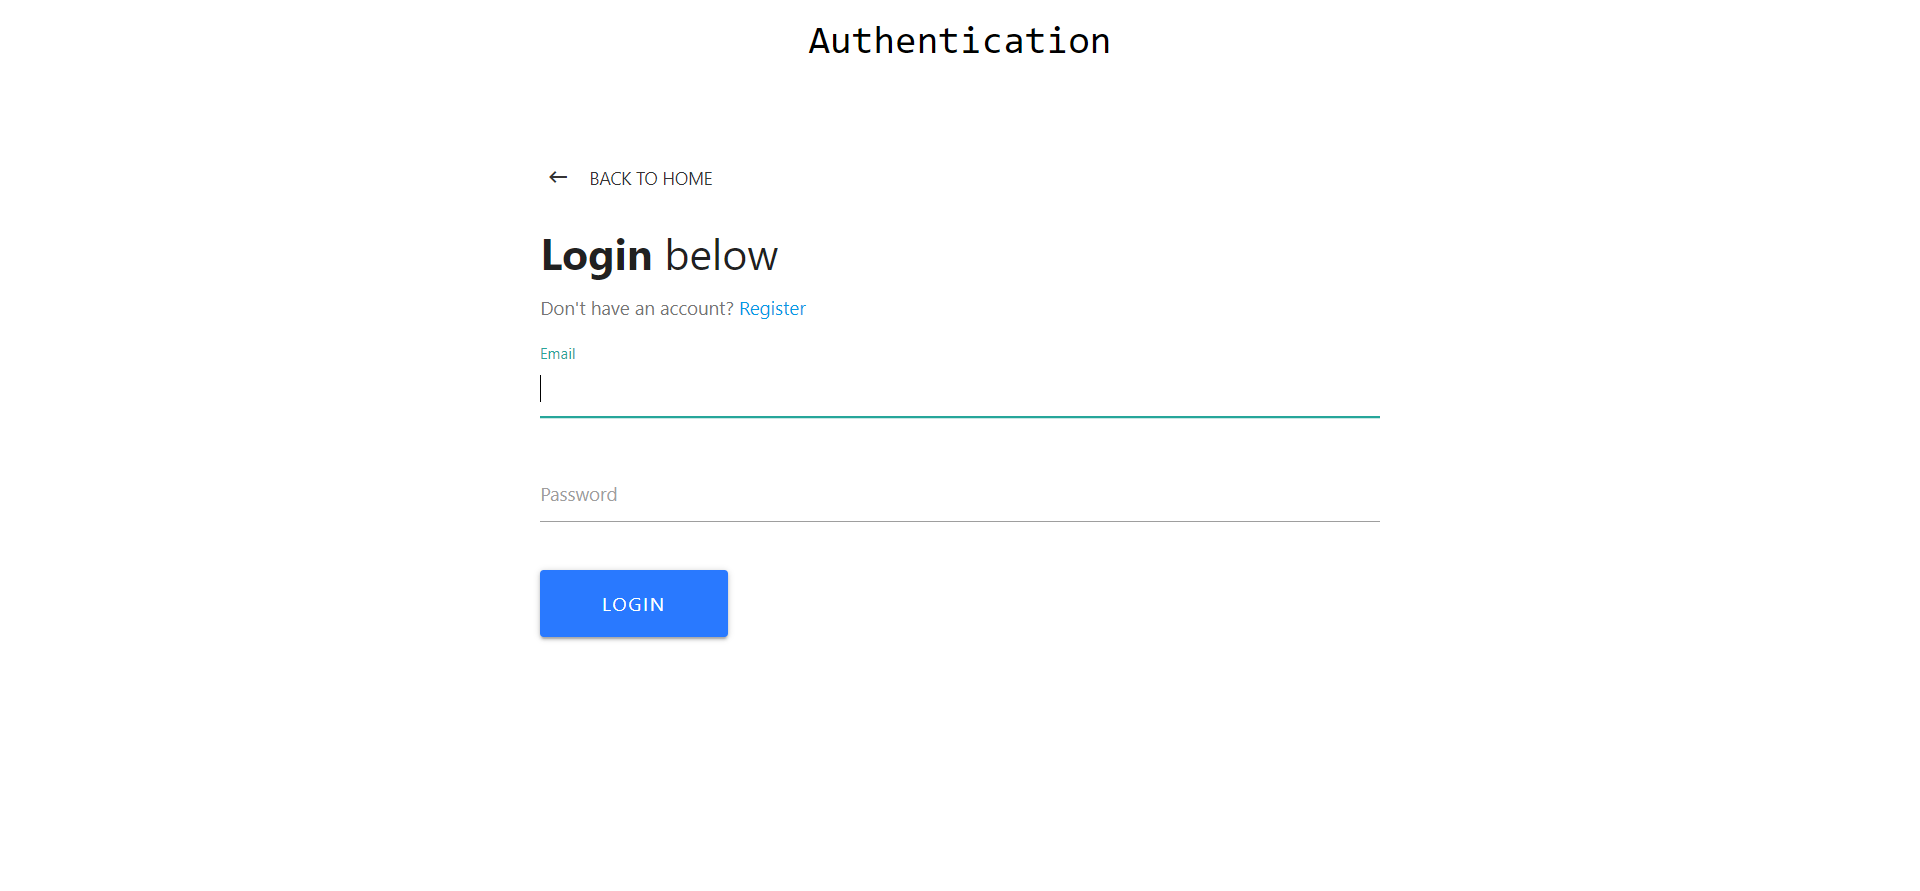
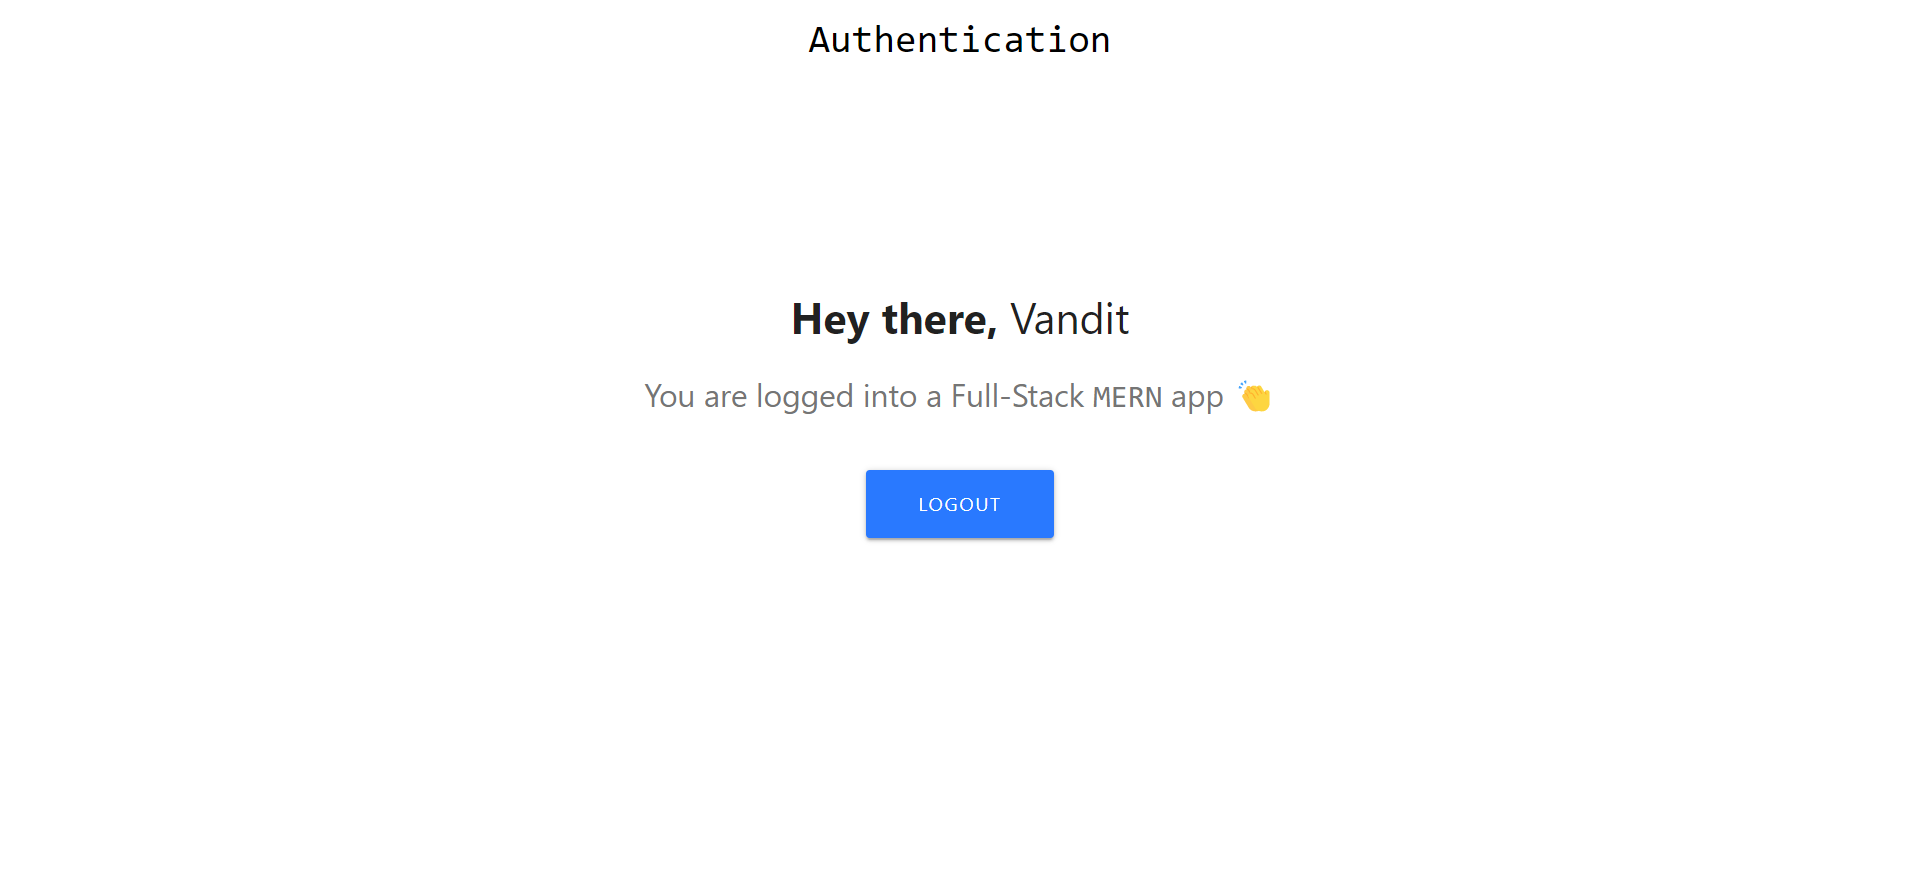
In this Project I’ve create a Authentication Application Using MERN-Stack. First User is in Home page end I’ve create two option for Login & Registration After Registration user is go to the login and see the Dashboard.
⚪ How to Start
Step 1: First Download this project.
Step 2: Open Terminal and write ‘npm install’ command to install the node_modules of the back-end part.
Step 3: Open Terminal and write ‘cd client’ and then write ‘npm install’ command to install the node_modules of the front-end part.
Step 4: Open Terminal and write ‘cd ..’ to back the directory.
Step 5: Now you write ‘npm run dev’ command to run the entire project.
Step 6: Now you write ‘npm run dev’ command to run the entire project.
Step 7: And Now you are got to the browser end write ‘localhost:3000’ command to see the home page like below output.
Step 8: Now you can you can regester your-self and login and then use the entire project for your Authentication for any query regarding this project ping me!

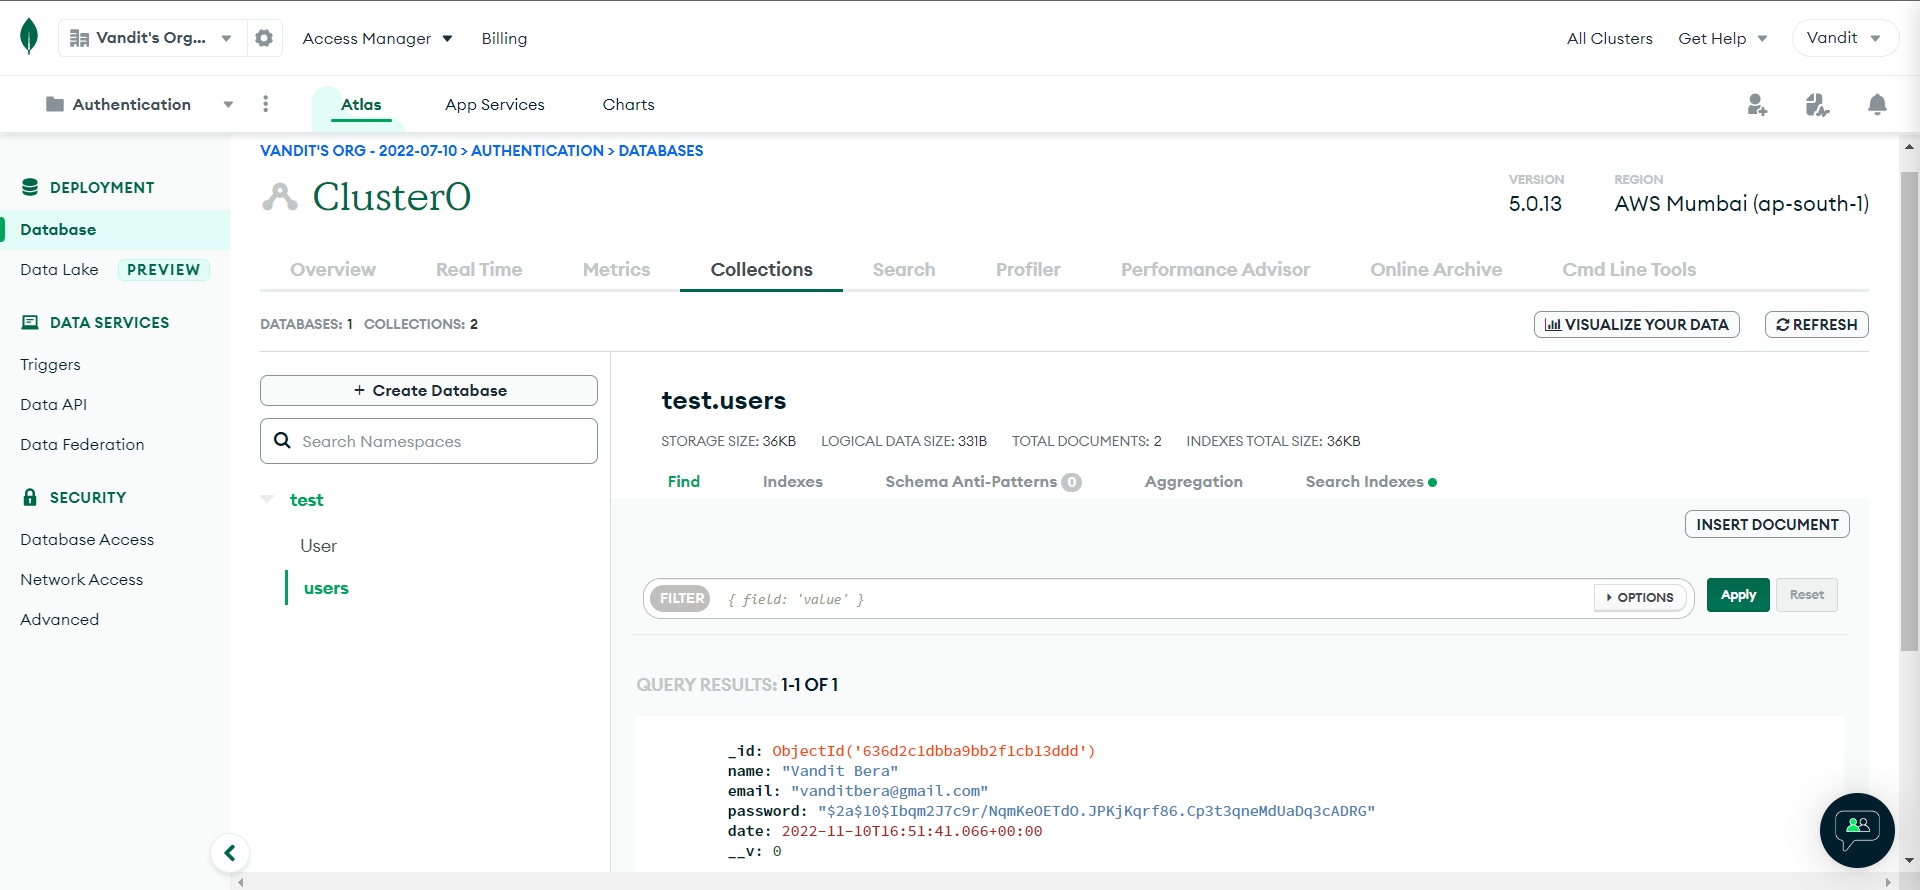
If you want to change your databse so, you can go to this path ‘config -> keys.js’ and putup your databse connection_URL and secretOrKey you can give any 16 no. of random character string.
➿ Built With
Using Technologies
- ReactJS
- NodeJS
- mongoose
- expressJS
🌈 Learnt
In This project I learnt about MERN-Stack Application for Authentication.
- ReactJS
- MongoDB
⏱️ Time
For this project I took around 3 to 4 hours to complete it.
Project Link: GitHub